Grilling is one of the most enjoyable ways to cook outdoors, and the Napoleon 365sb is a premium grill designed for both amateur and experienced grillers. To ensure safety and optimal performance, it is crucial to follow the Napoleon 365sb assembly instructions meticulously. This guide provides a detailed, step-by-step approach to assembling your grill, helping you get it ready for your first cookout with confidence.
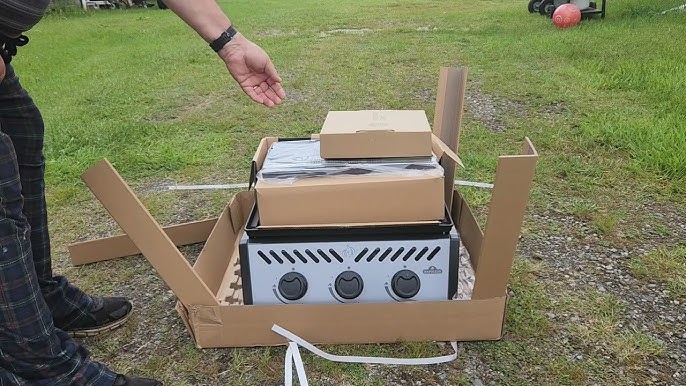
Unpacking Your Napoleon 365sb
Before starting assembly, carefully unpack all components of your Napoleon 365sb. Typically, you should have:
Main grill body and lid
Burner tubes and ignition components
Cooking grates and sear plates
Side shelves, brackets, and hooks
Hardware kit including screws, bolts, and washers
Gas hose, regulator, and safety instructions
Check each part against the included inventory sheet. Missing or damaged parts can compromise assembly, so resolve any issues with the retailer before proceeding.
Tools Needed for Assembly
The Napoleon 365sb assembly instructions are designed for straightforward DIY setup, but having the right tools makes the process smoother:
Adjustable wrench or socket set
Phillips and flathead screwdrivers
Allen wrenches (usually included in the kit)
Needle-nose pliers
Measuring tape
Protective gloves
Organizing all parts and tools beforehand helps avoid unnecessary frustration during assembly.
Step 1: Preparing the Grill Base
Select a Level Surface: Place the cart or base on a flat, sturdy surface to ensure stability.
Attach Wheels or Casters: If your model comes with wheels, install them according to the instructions. Lock the casters once installed to prevent movement.
Secure the Grill Body: Position the main body of the grill onto the base and fasten it with the screws provided.
Tip: Keep screws slightly loose until all components are positioned to allow minor adjustments.
Step 2: Installing Burners and Gas Connections
Insert Burners Properly: Slide burner tubes into the slots on the grill body, ensuring they align with the ignition ports.
Connect Gas Lines: Attach the gas hose and regulator securely to the burners. Use clamps provided to prevent leaks.
Test for Leaks: Mix water and dish soap, apply to gas connections, and slowly open the gas valve. Watch for bubbles indicating leaks.
Important: Never skip the leak test—safety comes first.
Step 3: Adding Side Shelves and Accessories
Attach Side Shelves: Use brackets and screws to mount side shelves. They provide workspace for prep and tools.
Install Optional Accessories: Depending on your model, attach warming racks, rotisserie kits, or spice racks according to the manual.
Place Cooking Grates: Position cooking grates and sear plates over burners. Ensure they fit snugly and sit evenly.
Tip: Tighten screws carefully—avoid overtightening to prevent damage.
Step 4: Final Assembly and Safety Checks
Tighten All Fasteners: Go through the grill and make sure all bolts and screws are secure.
Check Ignition: Test each burner individually to confirm the ignition system works properly.
Stability Check: Push gently on the grill to ensure it does not tip. Make adjustments if needed.
Attach Gas Source: Connect propane or natural gas according to the safety instructions.
Following these Napoleon 365sb assembly instructions ensures a safe and fully functional grill ready for cooking.
Common Assembly Mistakes to Avoid
Even experienced grillers can make errors. Common mistakes include:
Skipping the gas leak test
Over-tightening screws, damaging threads
Misaligning burner tubes or ignition wires
Ignoring the manufacturer’s safety guidelines
Losing small hardware components during assembly
Double-checking each step minimizes these risks.
Maintenance Tips for Your Napoleon 365sb
Regular maintenance keeps your grill performing at its best:
Clean Grates After Use: Remove food residues to prevent rust and flare-ups.
Inspect Gas Lines: Regularly check hoses for cracks or wear.
Cover the Grill: Protect your grill from weather with a fitted cover.
Deep Clean Periodically: Remove burners and grates to clean internal surfaces.
Store Accessories Properly: Keep removable parts dry and safe when not in use.
A well-maintained grill lasts longer and delivers better cooking results.
Why Proper Assembly Matters
Following the Napoleon 365sb assembly instructions is more than a convenience—it ensures safety and optimal grilling performance. Misassembly can lead to gas leaks, unstable surfaces, and uneven cooking. Taking the time to assemble your grill correctly prevents accidents and guarantees a better outdoor cooking experience.
Conclusion
Mastering the Napoleon 365sb assembly instructions is the foundation for safe, enjoyable, and long-lasting grilling. By carefully unboxing, organizing tools, following step-by-step instructions, and performing thorough safety checks, you ensure your grill is ready for every backyard cookout.
Investing the effort into proper assembly pays off with flawless performance, peace of mind, and countless memorable meals. Your Napoleon 365sb is more than a grill—it’s an investment in quality outdoor cooking.
FAQs
1. How long does it take to assemble the Napoleon 365sb?
Assembly generally takes between 90 minutes to 2 hours, depending on your familiarity with grills and tools.
2. Can I assemble the grill alone?
Yes, but having a second person can make handling heavy components like the grill body easier and safer.
3. Is professional installation recommended?
Not necessary for most users. Following the manual carefully is sufficient, though professional help can add peace of mind.
4. How do I prevent gas leaks during assembly?
Always perform a soapy water test on all gas connections. Replace faulty hoses immediately.
5. Are replacement parts available for the Napoleon 365sb?
Yes. Napoleon offers replacement burners, grates, ignition parts, and accessories through authorized dealers and their official website.